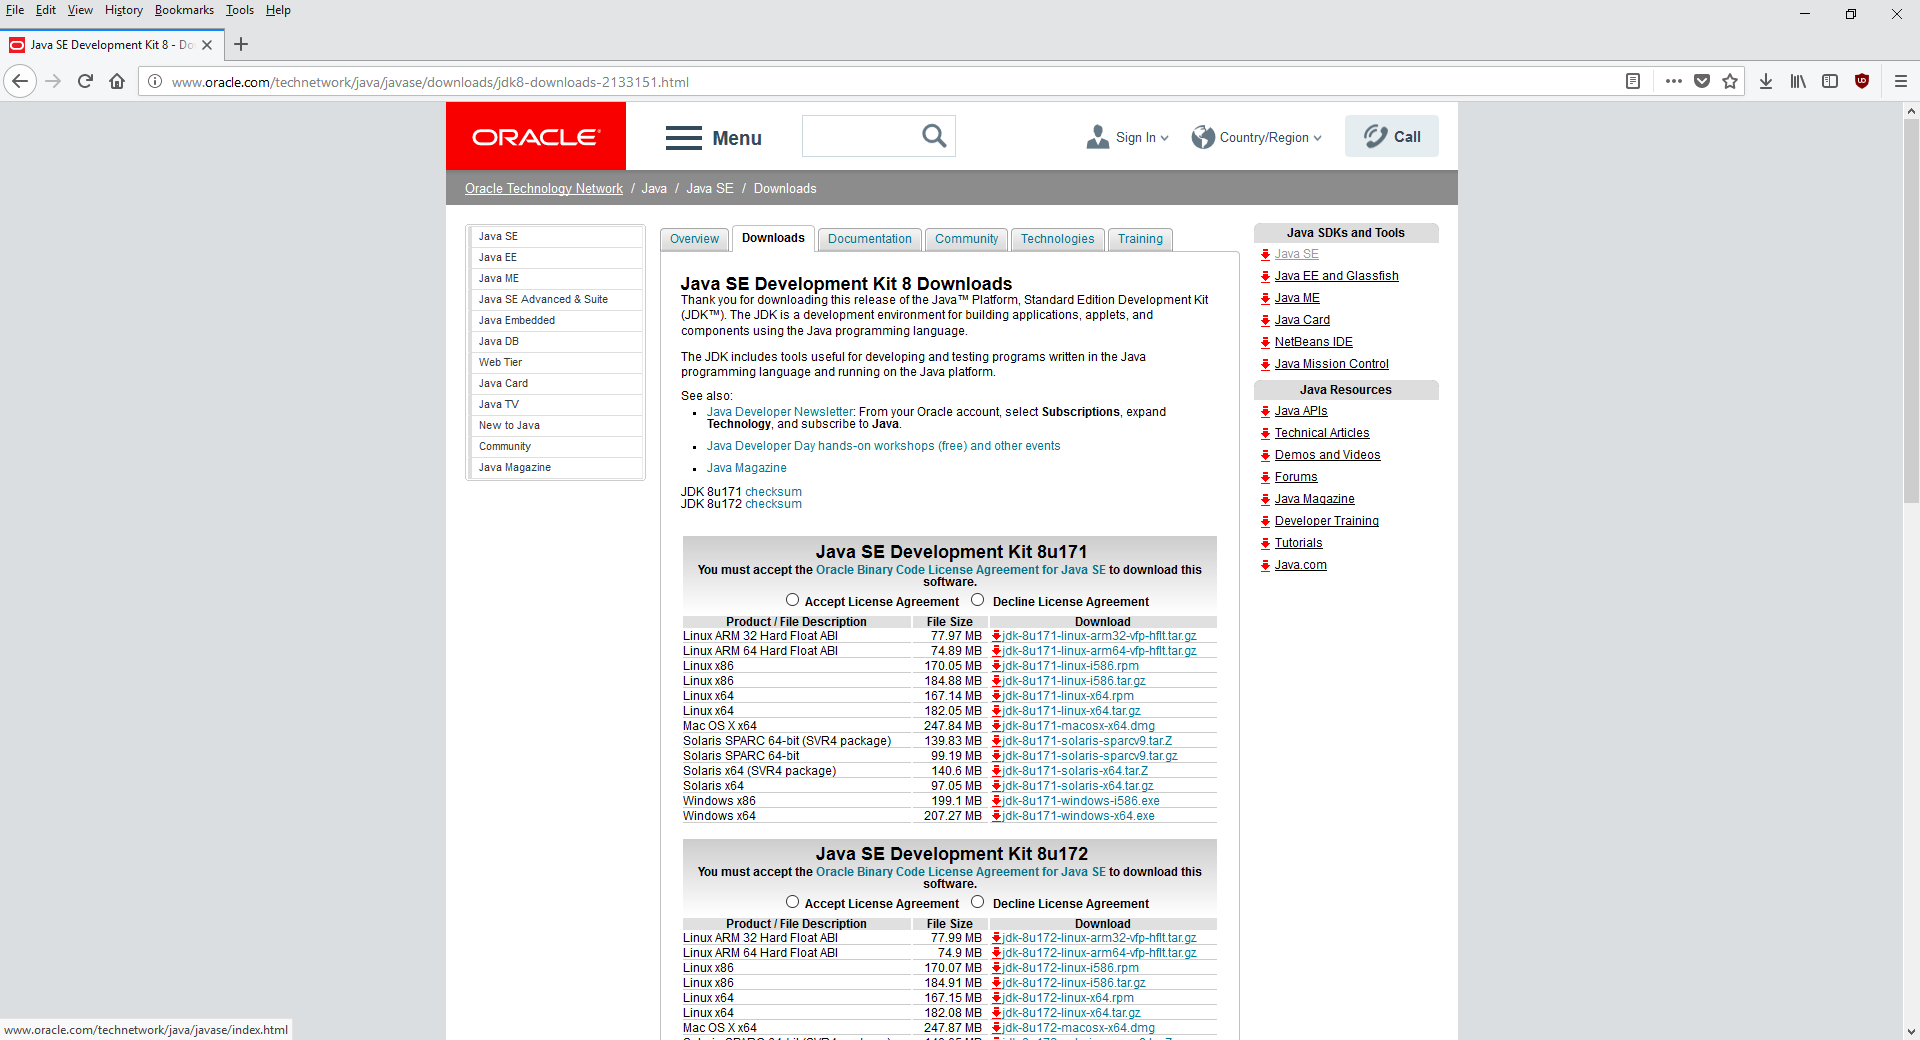
The first thing you’ll need to get started is the latest JDK 8 (Java Development Kit 8). Download it from Oracle or AdoptOpenJDK.
Follow the instructions in the installer.
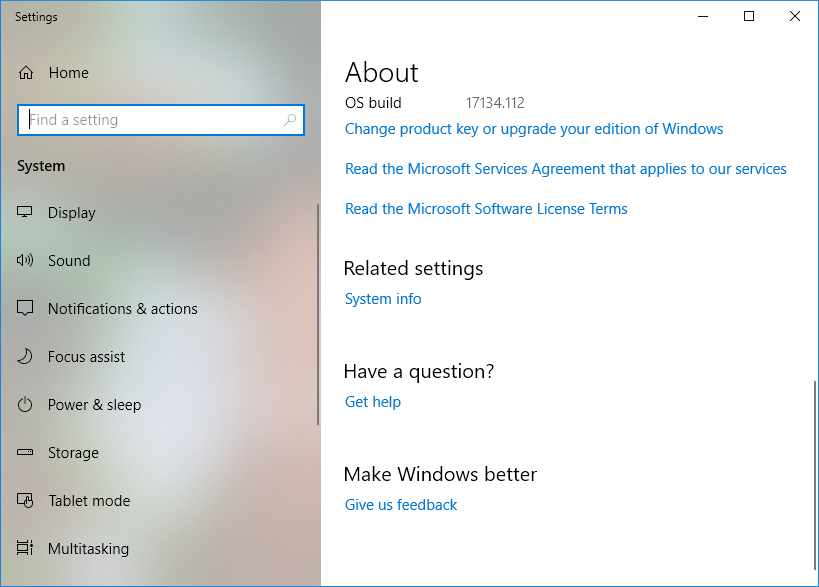
After the JDK finishes installing, you’ll need to set the Path and JAVA_HOME environment variables (On Macs this rarely has to be done, just make sure you only have Java 8 installed). This tells Forge where you’ve installed Java. To do this (in Windows 10), right-click the start menu and go to System. Then, scroll down until you see System Info.
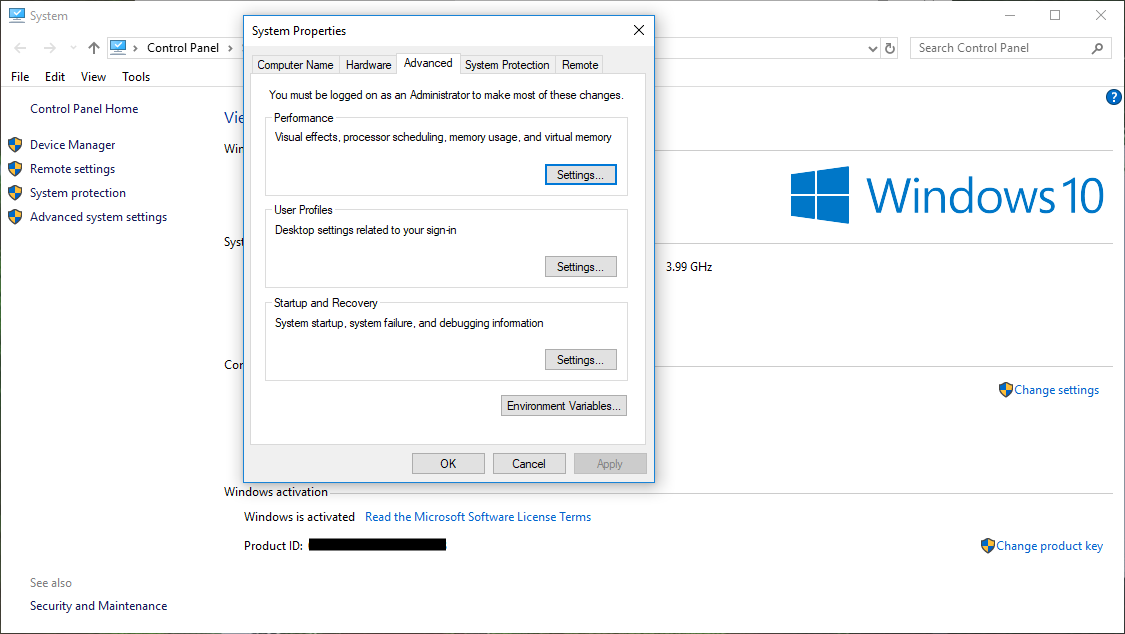
Click that, and in the window that pops up, click on Advanced system settings.
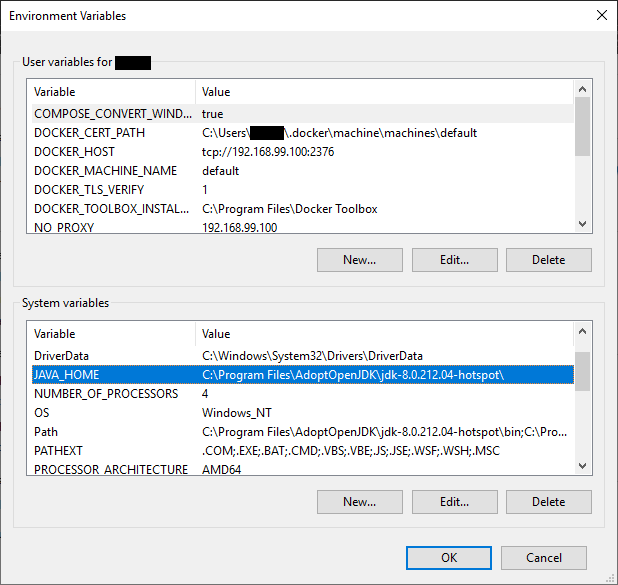
Click the Environment Variables… button. Please note that changing any environment variables in any way can permanently mess up your computer! Be careful to follow the instructions exactly! In System Variables, edit the Path variable or create it if you don’t have it. Add the path to the bin folder of the JDK you just installed. This should look something like this (if you installed it directly from Oracle): C:\Program Files\Java\jdk1.8.0_191\bin. If you downloaded the JDK from AdoptOpenJDK, the path will look like this: C:\Program Files\AdoptOpenJDK\jdk-8.0.212.04-hotspot\bin. Next, click OK. Now, create the JAVA_HOME system variable. The path that goes into this one should be exactly the same as the last one, except for the lack of \bin. It should look something like this: C:\Program Files\Java\jdk1.8.0_191 or C:\Program Files\AdoptOpenJDK\jdk-8.0.212.04-hotspot. After you create it, click OK in all the boxes.
Congrats! Java is completely set up!
The next step is to download an IDE (Integrated Development Environment) of your choice. Eclipse will be used in these tutorials. You can also use IntelliJ IDEA, but we will only be covering Eclipse here. You can use their installer, or you can download a package (my preferred method). You can get the IDE for Java or for Java EE; either one works just fine.

To install a package, simply download the zip and extract it to a folder of your choosing. Now that Eclipse is installed, let’s install Forge!
Download the latest Minecraft Forge MDK (Mod Development/Developer Kit) (NOT the installer!). Extract the zip to any directory. You’ll need to edit two files in here before you can continue; one will update the version of Gradle and the other will update the MCP (Mod Coder Pack) mappings used for the source code of Minecraft.
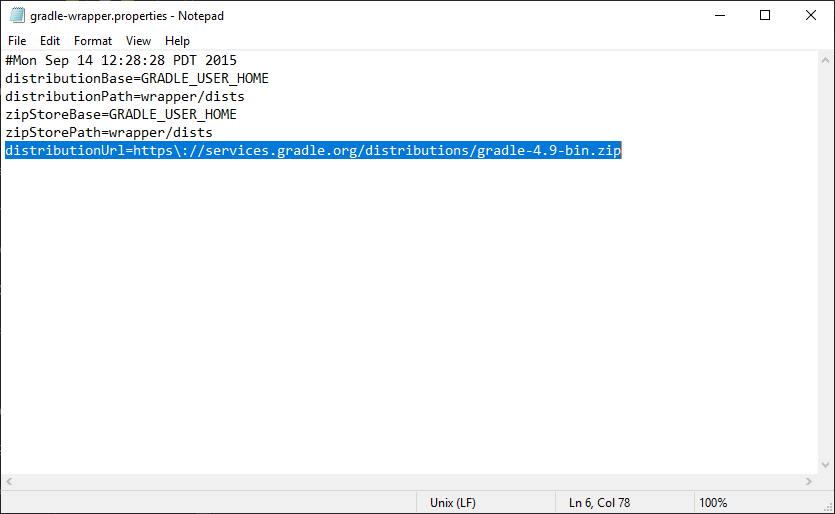
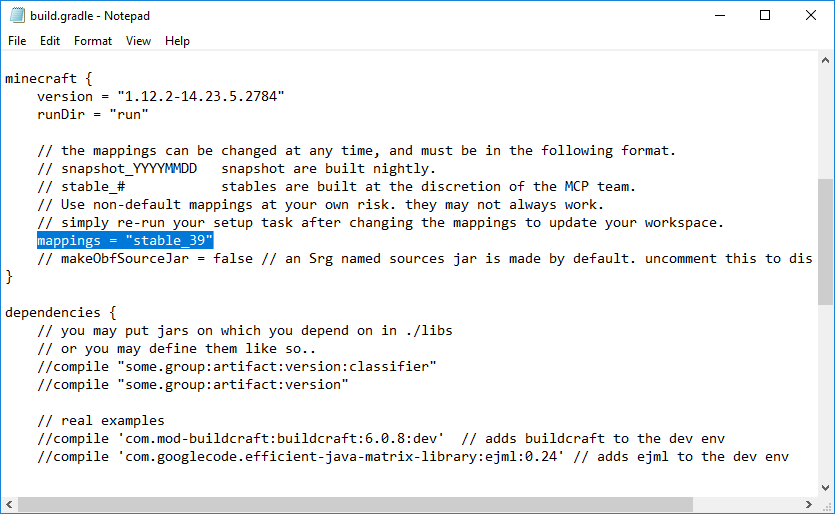
First, go to <MDK_dir>/gradle/wrapper, where <MDK_dir> is where you installed the MDK. In this folder you will find a file named gradle-wrapper.properties. Open this and change where it says gradle-2.14-bin.zip to gradle-4.9-bin.zip (under distributionUrl). Then go to the build.gradle file in your root MDK directory. Find where it says mappings="snapshot_XXXXXXXX", in the minecraft {} block of code. Change "snapshot_XXXXXXXX" to "stable_39". This is the latest and final version of mappings for 1.12.2. These steps are technically optional, but it is good practice to keep up-to-date with mappings, and using a newer version of Gradle will help speed up the build process and setup commands.
Almost there! To finish setting up, we need to get your project into Eclipse. The easiest way to do that is by importing the project as a Gradle project. This allows you to run Gradle tasks directly from your IDE, meaning that you can build or set up your project, update the Forge version, and more, without touching the command line or leaving Eclipse!
Create a new folder named workspace wherever, then copy the MDK you downloaded to a new folder inside of workspace. Name this folder whatever you would like your project to be named. Next, open up Eclipse and point the workspace to your workspace folder. In Eclipse, go to File > Import... > Gradle > Existing Gradle Project. Enter the directory of your project and click Finish.

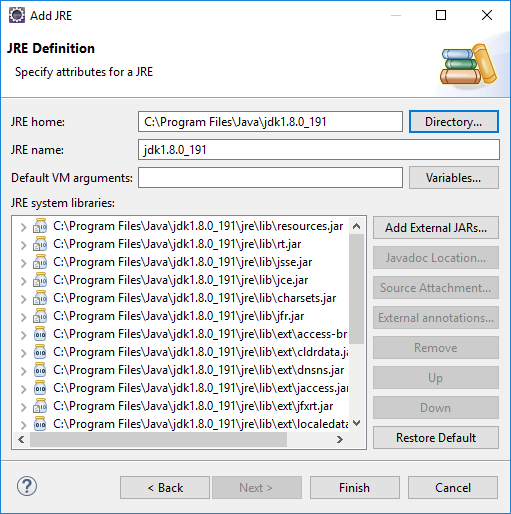
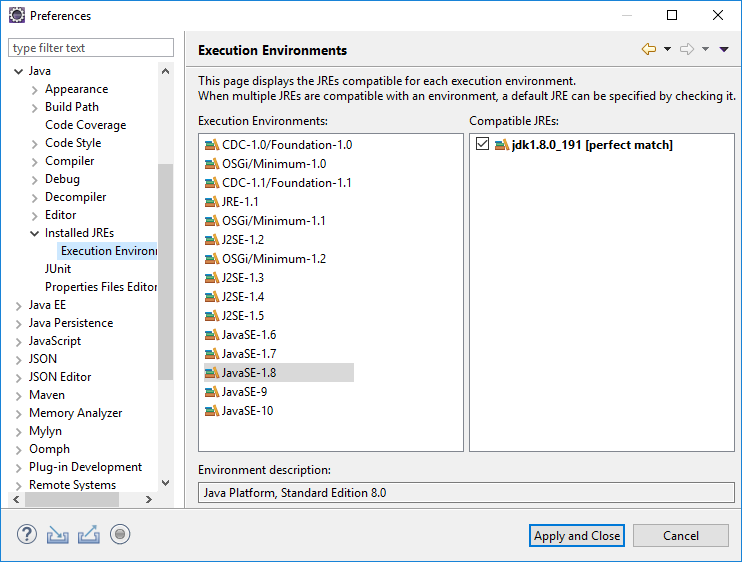
A window should pop up with all the Gradle tasks for this project. However, we need to make sure that Eclipse is configured to use the JDK, because it uses the JRE by default (for some reason). To change this, go to Window > Preferences > Java > Installed JREs. Click Add... > Standard VM and enter the path of the JDK (usually C:\Program Files\Java\jdk1.8.0_191). Click Finish to add the JDK and make sure it is selected. You can remove the old JRE if you want.
Click Apply, then, in Preferences, go to Java > Installed JREs > Execution Environments. Under JavaSE-1.8, select the JDK you just added.
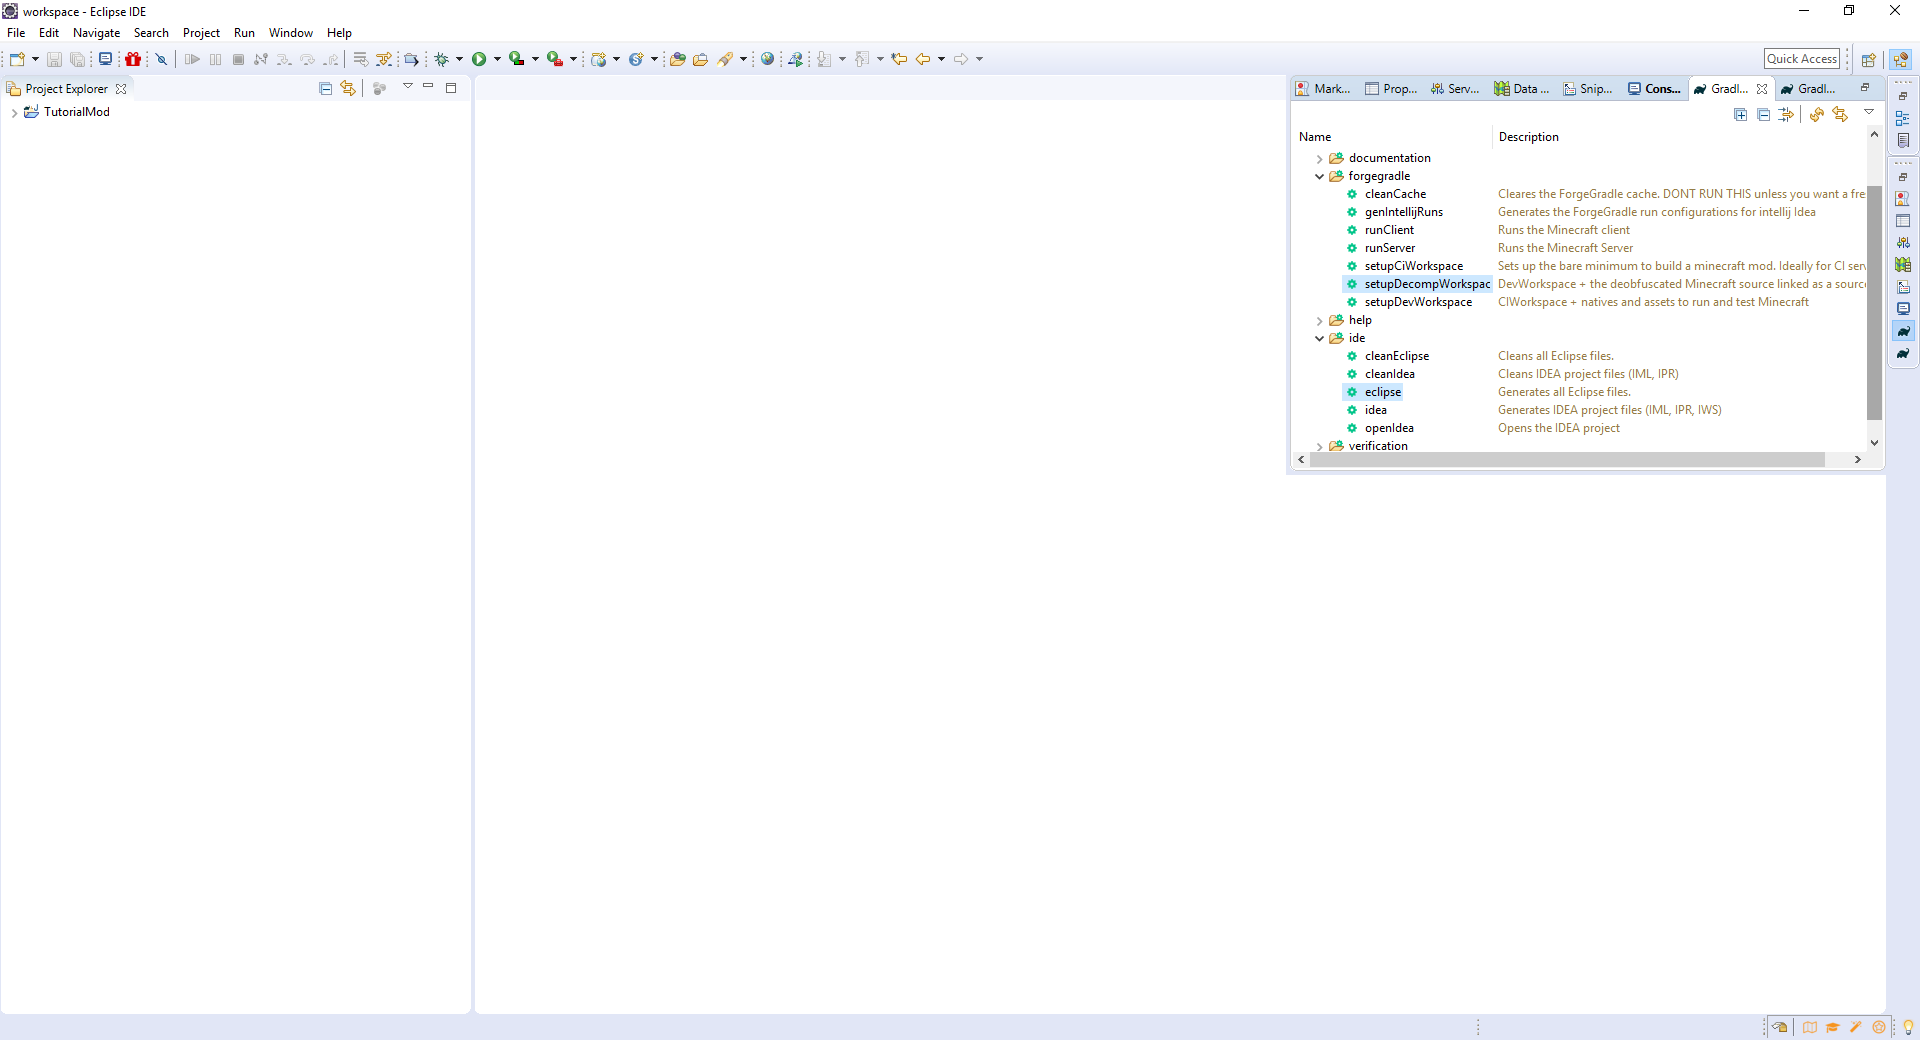
Just run the setupDecompWorkspace and eclipse tasks by double-clicking on them. Finally, select the project and press F5 to refresh it (or the run configurations won’t show up!). (You can also delete the example mod package and everything in the src/main/resources folder.) To run Minecraft, go to Run > Run Configurations... > Java Application, and double click the configuration ending in _Client. After the first run, it should automatically run it when you click the green run icon. And that’s it! You have a functional workspace for developing Minecraft mods!